About Me

My Blinkie
Thursday, February 13, 2020

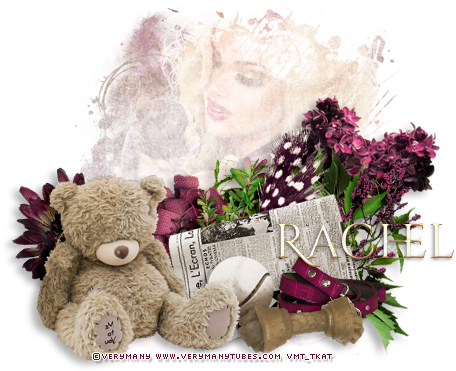
Monday, February 10, 2020

This tutorial was written by me on February 10th, 2020 and is my own creation. Any resemblance to any other tutorial is purely coincidental and unintentional.
PSP Version used: PSP 2019
This tutorial assumes you have a good working knowledge of PSP.
Supplies:
Tube of choice. I am using the art of Julia Fox, which is included in the kit.
PTU kit from Savage Dezines called Pink Love

You can purchase the kit here.
Mask 29 from Vivienne. You can find it here.
Font of choice. I am using GorniSC Regular.
-------------------------------------------------------------------------------
Ok let’s get started.
Open frame 7. Set the canvas size to 600 x 600 px. Resize by 85%, all layers unchecked.
Open your mask & paper 7. Resize your paper by 67%. Paste your paper as a new layer onto your frame canvas. Move your paper below your frame layer. Apply your mask, merge group.
Open element 4. Resize by 80%. Paste as a new layer above your mask layer.
Open paper 3 & resize by 67%. Copy. On your frame layer, use your magic wand & click inside the frame. Selections, modify, expand by 10. Paste your paper as a new layer. Selections, invert & press delete. Deselect & move below your frame layer.
Now let’s add our remaining elements:
107 – resize by 50%. Paste as a new layer above your frame layer. Place to the top of your frame.
24 – resize by 30%, flip vertical. Place to the top right corner of the frame. Duplicate, image mirror.
104 – resize by 50%. Place over the right side of the frame. Duplicate, mirror horizontal.
21 – resize by 80%. Place to the bottom.
8 – resize by 50%. Paste as a new layer.
60 – resize by 60%. Paste as a new layer & place to the bottom right. Duplicate, image, mirror horizontal.
15 – resize by 40% Place to the bottom right.
96 – resize by 40%. Place over the black & pink foliage on the left, slightly up from the bottom.
144 – resize by 30%. Place a little down and to the right of the cameo.
141 – resize by 40%. Place to the bottom.
17 – resize by 50%. Place between the cameo & the letter. Move a little down towards the bottom.
18 – resize by 40%. Place slightly down & to the left side of the candle.
88 – resize by 30%. Place to the left of the swan.
45 – resize by 30%. Place to the bottom right of the jar we just added.
91 – resize by 80%, rotate right. Place to the bottom.
36 – resize by 60%. Place along the bottom edge of the bottom elements.
49 – resize by 25%. Place to the bottom of the candle.
14 – resize by 45%. Paste as a new layer.
Open your tube, resizing as necessary. Paste your tube just above the duplicate foliage layer & center over your frame. Duplicate your tube, gaussian blur 3.00. Set the blend mode to Screen, 77.
Add your name, copyright, & license info.
Note: If using the same font, I changed the kerning to -100 as there is extra spacing between the letters.
Apply a drop shadow of choice to your layers, then merge visible. Save as a png.
Thanks for checking out my tutorials.
Wednesday, February 5, 2020

This tutorial was written by me on February 5th, 2020 and is my own creation. Any resemblance to any other tutorial is purely coincidental and unintentional.
PSP Version used: PSP 2019
This tutorial assumes you have a good working knowledge of PSP.
Supplies:
Tube of choice. I am using the art of Vadis. You can find their tubes here.
In My Garden PTU kit from Neen’s Designz

You can purchase the kit here.
Font of choice. I am using Summer.
Filters:
EyeCandy 4000 – Bevel Boss
Mura Meister Copies
-------------------------------------------------------------------------------
Open a new blank image, 600 x 600 px.
Set your foreground to #f0e7da & your background to null. With your ellipse shape tool, width set to 40, create an oval a little smaller than your canvas. When you are satisfied with the size & shape, right click over the layer in the layer palette, convert to raster layer.
EyeCandy 4000 – Bevel Boss
In the Bevel Profile tab, click on the cutaround preset. Click ok.
Objects, align, center in canvas.
Open Element 50. Resize by 40%. Paste as a new layer.
Mura Meister Copies – select the encircle preset & change the Shift Y to 60. Move this layer below the frame layer.
Open Paper 12. Resize by 75%.
On your frame layer, use your magic wand & click inside the frame. Selections, modify, expand by 10. Paste your paper as a new layer. Selections, invert & press delete. Deselect & move the paper below the frame layer.
Now let’s add our elements:
131 – resize by 30%, flip vertical. Paste as a new layer above the frame layer. Place to the top of the frame, a little to the right. Rotate slightly to the left. Duplicate, mirror horizontal.
16 – resize by 50%. Place to the top of the frame.
40 – resize by 30%. Place to the bottom right.
27 – resize by 40%. Place to the bottom, a little to the right. Duplicate, mirror horizontal. Move the duplicate layer below the original layer.
37 – resize by 30%. Place to the bottom right. Move this layer just above the duplicate grass layer & below the original.
129 – resize by 50%. Place to the bottom left. Rotate slightly to the left. Duplicate, mirror horizontal.
25 – resize by 15%. Place to the bottom right side of the vase. Duplicate, mirror horizontal. Move the duplicate layer to the top layer.
93 – resize by 40%. Paste as a new layer just above the original blue flower layer. Place to the bottom of the vase, slightly to the right.
110 – resize by 60%. Paste as a new layer above the top most grass layer. Place to the bottom.
111 – resize by 60%. Place to the bottom, slightly to the right.
28 – resize by 83%. Paste as a new layer.
36 – resize by 50%. Place to the bottom right, a little to the left.
5 – resize by 15%. Paste as a new layer above the duplicate blue flower layer. Place just below the bud of the duplicate blue flower, slightly to the right.
9 – resize by 30%. Place to the bottom of the dog.
125 – resize by 20%. Place to the bottom left of the dog.
136 – resize by 15%. Place to the bottom of the bunch of purple flowers, a little to the right of the left edge.
8 – resize by 25%, flip horizontal. Place just above the vase.
117 – resize by 25%. Place to the bottom right of the dog.
57 – resize by 15%. Place to the bottom left of the tea set.
64 – resize by 10%. Place over the vase.
Open your tube & paste as a new layer above the paper layer. Place your tube’s face over the paper. On the paper layer, select all, float, defloat. On the tube layer, selections, invert & press delete. Deselect. Duplicate your tube, gaussian blur 3.00. Set the blend mode to screen, 83. On the original layer, set the blend mode to luminance (L), 15.
Paste your tube again, this time just below the vase layer. Resize your tube as necessary, flip horizontal. Place to your liking. Duplicate your tube, gaussian blur with the same settings as before. Set the blend mode to screen, 75.
Add your name, copyright, & license info. Apply a drop shadow of choice to your layers, then merge visible. Save as a png.
Thanks for checking out my tutorials.
Tuesday, January 28, 2020

This tutorial was written by me on January 27th, 2020 and is my own creation. Any resemblance to any other tutorial is purely coincidental and unintentional.
PSP Version used: PSP 2019
This tutorial assumes you have a good working knowledge of PSP.
Supplies:
Tube of choice. I am using the art of Misticheskaya. You can purchase her tubes here.
Celebrate Love PTU kit from Moonshine Dezinez.

You can purchase the kit here.
Mask 56 by Trese. You can find them here.
Font of choice. I am using Israquella Monoline.
Filters:
Xero - Radiance
-------------------------------------------------------------------------------
Ok let’s get started.
Open Frame02. Resize by 60%.
Open your mask & Paper07. Resize your paper by 60%. Paste your paper as a new layer onto your frame canvas. Move below the frame layer. Apply your mask, merge group.
On the frame layer, use your magic wand & click inside the frame. Selections, modify, expand by 5. Open Paper02 & resize by 60%. Paste as a new layer onto your frame canvas. Selections, invert & press delete. Deselect & move below the frame layer.
Open Element04 & resize by 50%. Paste as a new layer onto your frame canvas. Place to the outer right side of the frame. Move this layer to just above the mask layer. Duplicate, mirror horizontal.
Open Element03 & resize by 20%. Paste as a new layer. Objects, align, right. Place along the outer right edge of the frame, about 1/3 of the way down from the top. Duplicate, mirror horizontal.
Open Element23 & resize by 20%. Paste as a new layer. Objects, alight, right. Place along the outer right edge of the frame, about 2/3 of the way down from the top. Duplicate, mirror, horizontal. Duplicate each copy of red rose. Place each to the top of the frame. See my tag for reference.
Ok now let’s add our remaining elements:
13 – resize by 25%. Paste as a new layer above the frame layer. Place to the bottom left of the frame. Rotate slightly to the left.
21 – resize by 30%. Place to the bottom left of the heart.
27 – resize by 25%. Place to the top of the frame opening. Place over the left half of the frame opening. Duplicate & place over the right half of the frame opening.
29 – resize by 40%. Place to the top, between the white mesh flowers.
57 – resize by 20%, flip vertical. Place down & to the right of the right mesh flower. Duplicate, mirror horizontal.
14 – resize by 30%. Place to the inside bottom right of the frame.
Duplicate your white mesh flower layer & bring to the top layer. Place to the bottom, over the green leaves we just added.
Duplicate your light pink flower layer, flip vertical. Move this layer to the top & place to the right side of the bottom mesh flower.
09 – resize by 50%. Place to the top right of your frame.
06 – resize by 40%. Place to the bottom right of the bottom light pink flower.
Duplicate one of the dark red flower layers. Move this layer to the top & place to the left side of the bottom mesh flower.
32 – resize by 50%. Place to the bottom.
28 – resize by 40%. Place to the bottom right of the wordart.
41 – resize by 30%. Place to the bottom left of the gift box.
Open your tube, resizing as necessary. Paste as a new layer just below the bottom leaves layer & place to your liking. Use your rectangle selection tool and create a selection around the bottom of the tube that hangs below the bottom of the flowers at the bottom. Press delete, deselect.
Xero – Radiance using the following settings:
Strangeness – 90
Charm – 50
Truth – 128
Beauty – 255
Add your name, copyrights, & license info. Apply a drop shadow of choice to your layers, then merge visible. Save as a png.
Thanks for checking out my tutorials.
Friday, January 24, 2020

Wednesday, January 22, 2020

This tutorial was written by me on January 22nd, 2020 and is my own creation. Any resemblance to any other tutorial is purely coincidental and unintentional.
PSP Version used: PSP 2019
This tutorial assumes you have a good working knowledge of PSP.
Supplies:
Tube of choice. I am using the art of Alex Prihodko. You can purchase this tube here.
Angel of Love PTU kit from Moon Vixen Designs

You can purchase it here.
Mask 207 from Gems Taggin Scraps. You can find it here.
Font of choice. I am using Amanda Regular.
-------------------------------------------------------------------------------
Ok let’s get started.
Open Element 138. Set the canvas size to 700 x 700 px. Resize your frame by 70%, all layers unchecked.
Resize by 86%, all layers checked. Rotate your frame slightly to the left.
Open your mask & Paper 20. Resize your paper by 75%. Paste as a new layer onto your frame canvas. Move below your frame layer. Apply your mask, merge group.
Open Element 3. Paste as a new layer above your mask layer.
On your frame layer, use your magic wand & click inside the frame. Selections, modify, expand by 10. Open Paper 22 & resize by 75%. Paste as a new layer onto your frame canvas. Selections, invert & press delete. Deselect. Move below the frame layer.
Now let’s add our remaining elements:
48 – resize by 80%, rotate right. Paste as a new layer above the frame layer. Free rotate to the left so it’s at a similar angle as the frame. Place to the top of the frame.
58 – resize by 30%. Place to the bottom right.
97 – resize by 60%. Place to the bottom left corner of the frame. Duplicate, free rotate 90 degrees to the right. Place to the bottom, a little to the right.
43 – resize by 40%. Place over the original feather.
69 – resize by 20%. Place to the upper left corner of the gift. Rotate slightly to the right.
49 – resize by 40%, flip horizontal. Place to the bottom left of the gift.
11 – resize by 40%. Place towards the bottom of the original feather, move a little to the left.
98 – resize by 60%. Place to the bottom.
47 – resize by 50%. Place to the bottom of the original feather.
7 – resize by 20%. Place over the end of the branch of flowers at the top.
2 – resize by 25%. Place to the bottom right of the vase.
13 – resize by 25%. Place to the bottom left corner of the box.
21 – resize by 20%. Place to the bottom right corner of the box.
15 – resize by 15%. Place to the bottom right of the kitten.
132 – resize by 30%. Place to the bottom right, over the right half of the ring.
50 – resize by 80%. Place to the bottom left of your tag.
63 – resize by 75%. Paste as a new layer.
123 – resize by 40%. Place to the bottom left of the kitten.
Open your tube & paste as a new layer just above the flower branch layer, resizing as necessary. Place your tube to your liking. With your rectangle selection tool, draw a square around the bottom half of the tube that hangs below the bottom of the rest of your tag. Press delete, then deselect.
Add your name, copyright, & license info. Apply a drop shadow of choice to your layers, if desired, then merge visible. Save as a PNG.
Thanks for checking out my tutorials.
Saturday, January 18, 2020

Subscribe to:
Posts
(Atom)