About Me

My Blinkie

Sunday, March 29, 2020


Wednesday, March 25, 2020

This tutorial was written by me on March 25th, 2020 and is my own creation. Any resemblance to any other tutorial is purely coincidental and unintentional.
PSP Version used: PSP 2019
This tutorial assumes you have a good working knowledge of PSP.
Supplies:
Tube of choice. I am using the beautiful art of Margaret Morales. You can purchase her tubes here.
Flowers Bloom ptu kit from Bookworm Dezines

You can purchase the kit here.
Mask 892 by me. You can find it here.
Font of choice. I am using Carnivalee Freakshow.
-------------------------------------------------------------------------------
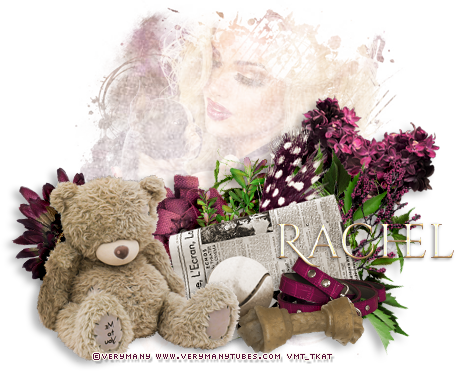
Open Element 60. Set the canvas size to 1081 x 1081. Resize by 56%. Resize again, this time resize by 90%, all layers unchecked.
Open your mask & Paper 20. Resize your paper by 75%, then paste as a new layer onto your frame canvas. Move the paper below the frame layer. Apply your mask, merge group.
Add noise, random, 5, monochrome checked.
On your frame layer, with your magic wand tool, click inside the frame. Selections, modify, expand by 10.
Open Paper 8 & resize by 62%. Paste as a new layer onto your frame canvas. Selections, invert & press delete. Deselect & move below the frame layer.
Open Element 74. Resize by 35%. Place to the upper right corner of the canvas. Move to just above the mask layer.
Now let’s add our remaining elements:
50 – resize by 20%, flip vertical. Paste as a new layer above the frame layer. Place to the upper right corner of the frame. Rotate slightly to the right.
67 – resize by 12%. Place over the bow, a little down & to the left.
12 – resize by 15%. Place over the bow. Rotate slightly to the right.
1 – resize by 20%, rotate right. Place to the left side of the frame, slightly towards the top. Rotate slightly to the left.
11 – resize by 25%, flip vertical then flip horizontal. Place over the purple leaf.
109 – resize by 30%. Place to the bottom, slightly to the right. Rotate slightly to the right.
112 – resize by 20%, flip horizontal. Place to the bottom right of the book.
Duplicate the pine branch & rotate right 90. Place to the bottom of the book.
87 – resize by 50%, rotate right. Place to the bottom of the duplicate pine branch.
6 – resize by 20%, flip horizontal. Place over the middle of the original pine branch.
42 – resize by 25%. Place over the right side of the book.
44 – resize by 20%. Place to the bottom so the berries are over the left side of the book.
20 – resize by 25%. Place to the bottom of the rust colored flowers.
52 – resize by 12%. Place to the top right of the book. Rotate a little to the right.
88 – resize by 80%, flip horizontal. Place to the bottom of the book.
110 – resize by 15%. Place over the left end of the ribbon.
103 – resize by 25%, rotate right 180. Place above the rust colored flowers.
101 – resize by 60%. Place to the bottom. Duplicate, rotate right 180. Place to the top.
Open your tube, resizing as necessary. Paste as a new layer above the original pine branch layer. Place slightly to the left of the center.
Add your name, copyright, & license info. Apply a drop shadow of choice, then merge visible. Save as a png.
Thanks for checking out my tutorials.
Monday, March 16, 2020

(Click to Enlarge)
This tutorial was written by me on March 16th, 2020 and is my own creation. Any resemblance to any other tutorial is purely coincidental and unintentional.
PSP Version used: PSP 2019
This tutorial assumes you have a good working knowledge of PSP.
Supplies:
Tube of choice. I am using the art of Alex Prihodko. I purchased this tube when they sold at Verymanytubes.com. You can purchase this tube here.
PTU kit from Bellisima Designs called A Basketful of Spring

You can purchase it here.
Font of choice. I am using Chalisa Octavia.
-------------------------------------------------------------------------------
Open a new blank image, 851 x 315.
Open paper 8. Resize by 24%. Paste as a new layer onto your working canvas.
Next we’ll add our elements:
50 – resize by 25%. Place over the left side of the canvas. Lower the opacity to 50.
54 – resize by 25%, rotate left. Paste as a new layer.
16 – resize by 25%, rotate right. Place to the left side. Duplicate, mirror horizontal.
25 – resize by 8%. Paste as a new layer. Duplicate, flip horizontal. Place the far left pearl over the far right pearl of the original. Merge down. Objects, align, horizontal center. Duplicate, flip horizontal. Match up the crystal at the end of the first merged strand. Duplicate, mirror, horizontal. Merge the strand layers together. Place to the top of your canvas.
37 – resize by 15%, rotate left. Paste as a new layer. Rotate to the left until the element is nearly straight up & down. Place to the left edge of your canvas. Duplicate, mirror horizontal.
31 – resize by 12%. Place over the white flowers. Duplicate, mirror horizontal.
42 – resize by 12%. Place to the left edge of the white flowers on the right. Rotate a little to the right. Move below the duplicate pink flower layer.
28 – resize by 8%. Paste as a new layer above the duplicate pink flower layer. Rotate so that the leaves are straighter horizontally. Place to the bottom, a little to the left. Duplicate, mirror horizontal. On the original, duplicate & place to the bottom left. Move this duplicate above the rest of the layers.
127 – resize by 10%. Paste as a new layer just below the top leaves layer. Place to the bottom, a little to the right of the left side.
29 – resize by 6%. Place to the top left edge of the right white flowers. Duplicate, flip horizontal, then flip vertical. Move above the top leaves layer. Place to the bottom left of the planter.
98 – resize by 10%. Place to the left side of the planter.
106 – resize by 25%, flip horizontal. Place to the bottom.
36 – resize by 5%. Place to the bottom right of the planter. Duplicate, mirror horizontal.
7 – resize by 12%. Paste as a new layer below the top daffodil layer. Place to the bottom, behind the right daffodil, a little to the left.
Duplicate the leaves in the left corner. Bring to the top layer, mirror horizontal.
10 – resize by 12%. Place to the bottom, between the two daffodils.
40 – resize by 8%. Place to the right of the right daffodil.
9 – resize by 5%. Place to the bottom left corner. Duplicate, mirror horizontal.
65 – resize by 25%. Place to the bottom.
21 – resize by 12%. Place towards the top of your canvas, slightly to the left.
114 – resize by 25%, rotate left. Paste as a new layer.
Open your tube & paste as a new layer just above the paper layer. Place to the right side, with her face showing over the canvas. Duplicate, gaussian blur 3.00. Set the blend mode to screen. Lower the opacity for the original to 30.
Add your name, copyright, & license info. Apply a drop shadow to your layers, then merge visible. Save as a png.
Thanks for checking out my tutorials.
Thursday, March 12, 2020

Monday, March 9, 2020

This tutorial was written by me on March 9th, 2020 and is my own creation. Any resemblance to any other tutorial is purely coincidental and unintentional.
Gimp Version used: Gimp 2.10.14
This tutorial assumes you have a good working knowledge of Gimp
Supplies:
Tube of choice. I am using the art of Alex Prihodko. This tube can be purchased here.
PTU kit Dark Queen by AngelKKreationz

You can purchase the kit here.
Mask 510 from Weescotslass Creations. You can find it here.
Font of choice. I am using Decalled Script.
-------------------------------------------------------------------------------
Open Frame 1. Set the canvas size to 600 x 600 px. With your scale tool, resize the frame, roughly about 80%.
With you alignment tool, center the frame in your canvas. Then with your rotate tool, rotate slightly to the left.
Open Paper 9. Resize to 600 x 600 px. Edit > Copy. On your frame canvas, Edit > Paste As > A New Layer. On your frame layer, use your fuzzy select tool & click inside the frame. Select, grow, 10. On your paper layer, Right click over the paper in the layer dialog, add alpha channel. Select > Inverse & press delete. Select none.
Open your mask & Paper 2. Resize your paper to 600 x 600 px. On your paper, Edit > Copy. On your frame canvas, Edit > Paste > As a new layer. Move to the bottom layer.
Apply your mask. I used Amy & Leah’s tutorial here.
Now let’s add our elements.
*Note: In order to scale/resize your images, we will be using the scale tool. Just scale by sight & using my tag as a reference.
7 – Edit > Copy. On your frame/working canvas with your frame layer highlighted, Edit > Paste > As a new layer, then scale. Place to the top right corner of the frame. Rotate slightly to the right.
10 – Edit > Copy. On your working canvas, Edit > Paste > As a new layer. With your flip tool, flip horizontally, then scale. Place over the right side of the frame.
39 – Edit > Copy. On the working canvas, Edit > Paste > As a new layer. Scale to size. Layer > Transform > Rotate 180. Place to the top half of the frame.
47 – Edit > Copy. On the working canvas, Edit > Paste > As a new layer. Scale to size. Place over the left side of the frame.
13 – Edit > Copy. On the working canvas, Edit > Paste > As a new layer. Scale to size. Place to the bottom, then a little to the right. Duplicate layer. Layer > Transform < Flip Horizontally & place just to the left of the center.
45 – Edit > Copy. On the working canvas, Edit > Paste > As a new layer. Scale to size. Place to the bottom of the dress, a little to the right.
11 – Edit > Copy. On the working canvas, Edit > Paste > As a new layer. Scale to size. Place to the bottom left of the dress.
25 – Edit > Copy. On the working canvas, Edit > Paste > As a new layer. Scale to size. Place to the bottom right side.
4 – Edit > Copy. Edit > Paste > As a new layer onto your working canvas. Scale to size. Place to the bottom of the pillow. Duplicate, then use your flip tool to flip horizontally. Place to the bottom of the boot.
9 – Edit > Copy. Edit > Paste > As a new layer onto your working canvas. Scale to size. Place to the bottom of the frame.
37 – Edit > Copy. Edit > Paste > As a new layer onto your working canvas. Scale to size. Place a little down & to the left of the left purple flower. Duplicate. With your flip tool, flip horizontally and place down & to the right of the duplicate purple flower.
48 – Edit > Copy. Edit > Paste > As a new layer onto your working canvas. Scale to size. Place to the left of the puppy.
36 – Edit > Copy. Edit > Paste > As a new layer. Scale to size & then place to the right of the puppy. With your flip tool, flip horizontal.
53 – Edit > Copy. Edit > Paste > As a new layer. Scale to size. Place to the left, just above the flower spray.
63 – Edit > Copy. Edit > Paste > As a new layer. Scale to size.
Open your tube. Edit > Copy. Edit > Paste > As a new layer. Scale to size. Use your flip tool & flip horizontal. Place to your liking. With your rectangle select tool, create a selection around any part of the tube that hangs below or to the sides of the tag itself. Press delete. Select > None.
Duplicate your tube. Filters > Blur > Gaussian Blur set to 1.50. Set the layer mode to Screen, 50.
Add your name, copyright, & license info.
Apply the following drop shadow to the layers of your choice: X & Y set to 5. Blur radius 5.00, Color black, Opacity 0.500.
To save your image: File > Export As & then name your file as a .png.
Thanks for checking out my tutorials.
Subscribe to:
Posts
(Atom)