PSP Version used: PSP 2020 Ultimate
This tutorial assumes you have a good working knowledge of PSP.
Supplies:
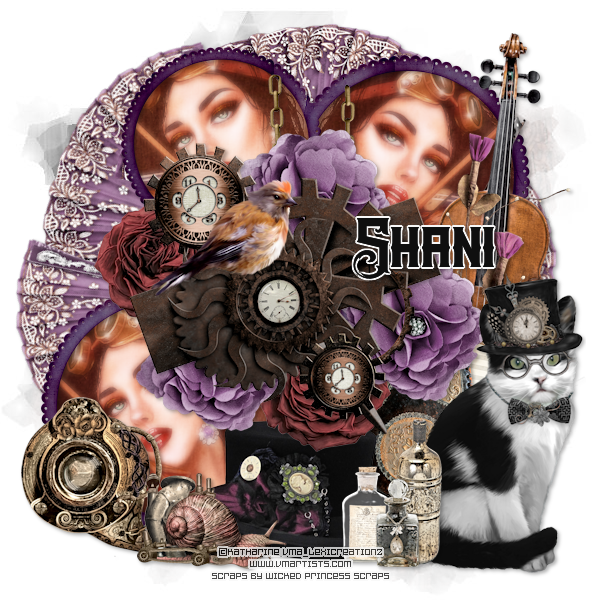
Tube of choice. I am using the art of Katharine. You can purchase this tube here.
PTU kit from Wicked Princess Scraps called Beautiful Melody
You can purchase the kit here.
Mask 19 from HorsePlay's Pasture. You can find it here.
Font of choice. I am using The Black Veil.
Filters:
Mura Meister Copies
-------------------------------------------------------------------------------
Open FRAME8. Set the canvas size to 600 x 600.
Open your mask & PAPER8. Resize your paper by 75%. Paste as a new layer onto your frame canvas. Move this layer to the bottom. Apply your mask, merge group.
Open the FAN. Resize by 60%. Paste as a new layer above the mask layer.
Mura Meister Copies. Select the Encircle preset. Change the number to 6. Click ok.
Open PAPER7. Resize by 75%, then copy.
On your working (frame) canvas, on the frame layer use your magic wand & click inside each frame. Selections, modify, expand by 5. Paste your paper as a new layer. Selections, invert & press delete. Deselect & move just below the frame layer.
Now let's add our remaining elements:
CHAIN - resize by 40%. Paste as a new layer above the frame layer, between the top two frames.VIOLIN1 - resize by 60%. Place to the right of the frames.FLOWER2 - resize by 60%. Place over the violin.BOOK1 - resize by 50%. Place to the bottom, a little to the left of the violin.HAT3 - resize by 45%. Place to the bottom.CLUSTER2 - resize by 60%. Paste as a new layer.FLOWER9 - resize by 35%. Paste as a new layer just below the cluster layer. Duplicate. Place one copy to the bottom left of the top clock of the cluster. Place the other to the bottom of the bottom clock.FLOWER3 - resize by 40%. Paste as a new layer, then duplicate twice. See my tag for placement of each flower.CAT - resize by 60%. Paste as a new layer above the cluster layer. Place to the bottom far right.BOTTLE1 - resize by 30%. Place to the bottom left of the cat.DECO7 - resize by 40%, flip horizontal. Place to the bottom left.SNAIL - resize by 30%. Place to the bottom, between the deco & hat.BIRD1 - resize by 25%. Place so the bird is sitting on the top of the center clock of the cluster.
Open your tube, resize as necessary. Paste as a new layer just above the brown paper layer. Paste behind the top left frame. Duplicate, flip horizontal & do the same for the top right frame. When satisfied with placement, merge the tube layers together. On the paper layer, select all, float, defloat. On the merged tube layer, selections, invert & press delete. Deselect. Paste your tube again, this time behind the bottom left frame. On the paper layer, select all, float, defloat. On the tube layer, selections, invert & press delete. Deselect, then merge with the other tubes layer.
Duplicate your tubes layer, gaussian blur 3.00. Set the blend mode to Screen. On the original merged tubes layer, set the blend mode to soft light.
Add a drop shadow of choice to your layers.
Hide your mask layer, then merge visible. Objects, align, center in canvas. Unhide your mask layer.
Add your name & drop shadow for your name, copyright, & license info. Save as a png.
Thanks for checking out my tutorials.


0 people loved this post!:
Post a Comment