Saturday, August 22, 2020
August 22, 2020 | Edit Post
This tutorial was written by me on August 22nd, 2020 and is my own creation. Any resemblance to any other tutorial is purely coincidental and unintentional.
PSP Version used: PSP 2020 Ultimate
This tutorial assumes you have a good working knowledge of PSP.
Supplies:
For this tutorial I am using the Sheena Pike Package 55 Bundle.
You can purchase this bundle here.
Mask 388 from Weescotslass Creations. You can find it here.
Template 252 from Toxic Desirez. You can find it here.
Font of choice. I am using Pink Diary.
Optional Filter: EyeCandy 4000 - Glass
-------------------------------------------------------------------------------
Open your template. Set the canvas size to 900 x 788. Resize by 67%.
Merge together layers: Raster 9 & Copy of Raster 9; Raster 8 & Copy of Raster 8; Raster 6 & Copy of Raster 6; Raster 7 & Copy of Raster 7; Raster 5 & Copy of Raster 5.
Delete layers: Raster 10, Copy of Raster 10, & Credits.
Replace each template layer with the following (resize each by 67% prior to replacing):
Raster 9 - Paper 1
Raster 8 - Paper 6
Raster 6 - Paper 5
Raster 7 - Paper 4
Raster 5 - Paper 3
Raster 11 - Paper 8
Raster 2 - Paper 2
Open your mask & Paper 7. Resize your paper, then paste as a new layer above the Raster 1 layer. Apply your mask, merge group. Resize by 90%, all layers unchecked.
Open Element 57. Resize by 80%. Paste as a new layer above the bottom rectangle layer.
Now let's add the remaining elements above the top layer:
2 - resize by 20%. Place to the right side, a little towards the top.
18 - resize by 25%. Place below the star.
62 - resize by 45%. Place to the bottom right. Duplicate, mirror horizontal.
44 - resize by 20%. Place to the upper left.
38 - resize by 30%. Place towards the top of the pink shape layer.
11 - resize by 30%. Place to the bottom left.
14 - resize by 12%. Place to the left side of the cake. Rotate slightly to the left & move below the cake layer.
17 - resize by 12%. Place to the right side of the cake & rotate slightly to the right.
21 - resize by 25%. Paste as a new layer above the cake layer & place to the bottom of the ice cream cones.
31 - resize by 25%. Place to the bottom of the cake, slightly to the left.
19 - resize by 20%. Place to the right of the heart.
Duplicate the orange & pink flower & move to the top layer. Place to the bottom left of the doughnut.
23 - resize by 12%. Place to the bottom of the doughnut, slightly to the right.
22 - resize by 8%; flip horizontal. Place to the bottom of the heart.
45 - resize by 50%. Place to the bottom.
Spray 11 - resize by 70%, then paste as a new layer.
Spray 8 - resize by 40%. Place a little to the left.
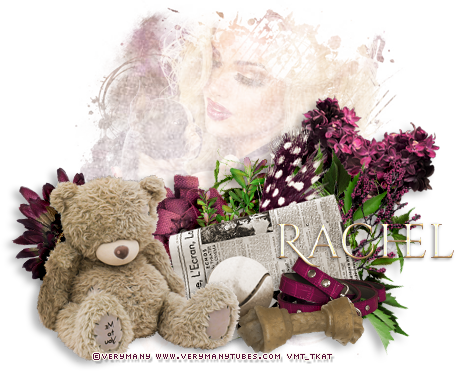
Open your tube, resizing as necessary. Paste as a new layer above the bow layer.
Add your name, then apply the Eye Candy - Glass settings of your choice.
Add your copyright & license info. Apply a drop shadow of choice to your layers, then merge visible.
Save as a png.
Thanks for checking out my tutorials.

Labeled under:PTU Tutorials
Subscribe to:
Post Comments
(Atom)
Categories
- Ads (4)
- ADU CT (31)
- Commercial Use (10)
- CT Results (1)
- CU/PU (3)
- CU4CU (1)
- Extras (5)
- Freebies (45)
- FTU Tutorials (3)
- Full Size (4)
- Gimp Tutorials (1)
- How To - Tutorials (PS) (1)
- Kits (1)
- Masks (30)
- New Products (8)
- Overlays (2)
- Personal Use (1)
- PTU Tutorials (42)
- Snags (1)
- Tag Showoffs (5)
- Tag Templates (5)
- Tagger Size (5)
- Templates (1)
- Textures (1)
- Updates (3)


0 people loved this post!:
Post a Comment